Affiliate Disclosure: We may earn money or products from the companies mentioned in this post.
Garage door openers are pretty important tools for modern garage doors, as they help to open or close a garage door. Without a garage door opener, it will be impossible for you to control your garage door remotely. However, like other devices or tools, your garage door opener might develop faults from time to time.
A damaged roller, overtime wear-out, and more can affect your garage door opener. You might need to repair or change your garage door opener when affected. Many are often lost on what to do or how to go about it when changing their garage door opener. Below, we will discuss everything you should know regarding changing your garage door opener.
Can I Replace a Garage Door Opener?
Although replacing a garage door opener can be complicated, it is pretty much something you can do as long as you have the necessary equipment. You can replace your garage door opener, depending on the type of opener you use and the level of technicality.
Most garage door openers in households today are openers that can be easily installed, removed, and replaced. You do not need a technician. With the right tool, you can replace your garage door opener within an hour on a pleasant afternoon.
How to Replace Garage Door Opener: Tips and Guide
As stated earlier, replacing your garage door opener can be a technical process. However, it is still something you can do as long as you follow the right steps. Below is a guide on replacing or changing your garage door opener.
1. Get the necessary Equipment and Unplug the Unit from the Power
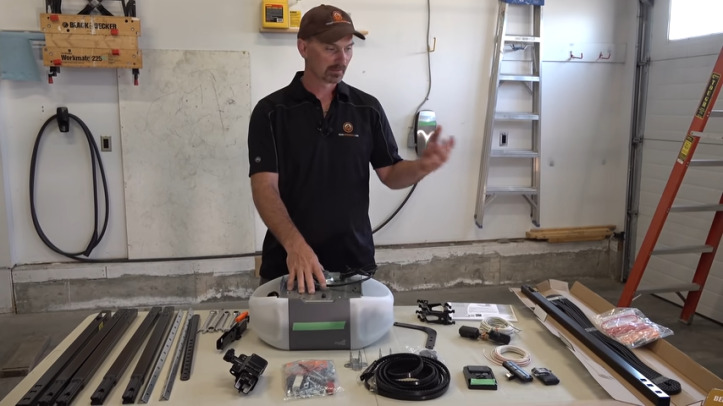
Having all the equipment or tools to change the garage door opener would be best. This is the first thing you must do if you want to change your garage door opener without the help of a technician. You need various tools such as a hand drill, support for the opener, screws (depending on the settings), and more.
Once you have the necessary tools, you must unplug your unit from power.
Unplugging the unit is pretty important as it prevents you from being exposed to electrical hazards or accidents. Do not just turn off the socket where your unit is plugged in, but unplug it from the socket completely.
2. Memorize or Label the Wiring and Settings
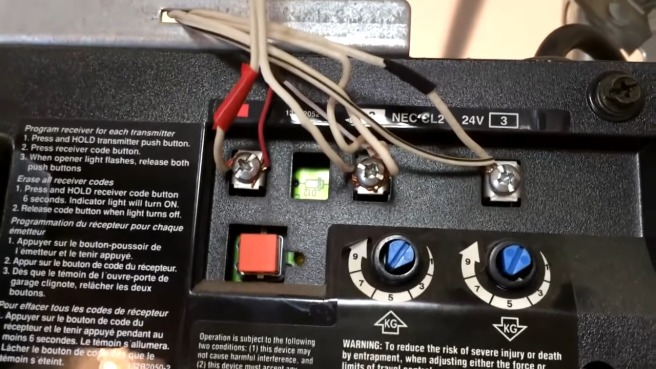
The moment you have successfully unplugged your unit from power, the next thing to do is carefully memorize the wiring of your current garage door opener. Memorizing the wiring is very important, as bad wiring will prevent your garage door opener from working.
You can prevent mistakes in the wiring in several ways, such as memorizing where each wire goes in the port. Label the wires according to the ports they should be connected to. You can use colored tape to label the red, black, and white wires.
Once you are done with the labeling, the next thing you must do is memorize the settings or adjustment of your current garage door pressure.
3. Unscrew the Wiring and Loosen the Bolts Holding the Unit in Place
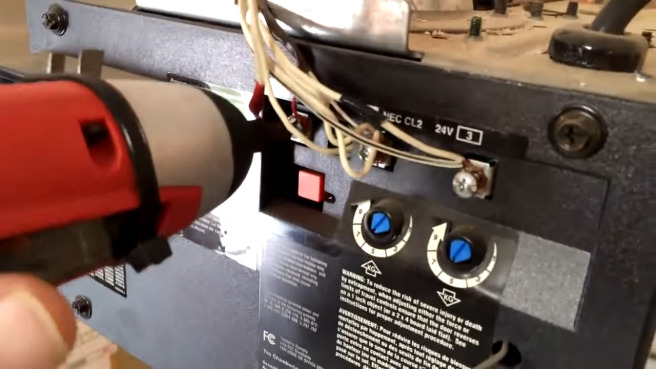
Once you are done memorizing the settings or wiring for your current garage door open, you can go ahead and unscrew or unplug the wires from the various ports on the garage door opener. Remember to label the wires before you unplug them to ensure a good wired connection for your new garage door opener.
Unscrew the bolts holding your garage door opener in place when you disconnect the wires from your garage door opener. Gently loosen the bolt but do not completely to ensure easy removal.
4. Gently Lower the Unit and Remove the Bolts Connecting the Tracks to the Motor
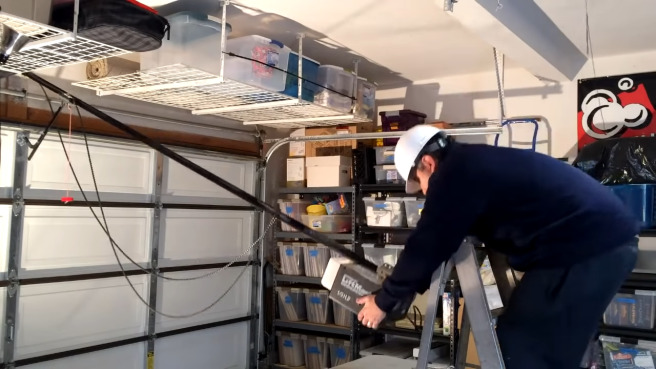
You can gently lower your unit once you unscrew the units from above. Use your hand to support the motor from underneath as you lower the units. Place the units on top of the folding table.
Remove the screws or bolts holding or connecting the tracks to the motor. Once you do this, you should be able to easily remove the motor from the tracks and change the units or garage door opener with ease.
5. Screw your New Motor to the Tracks
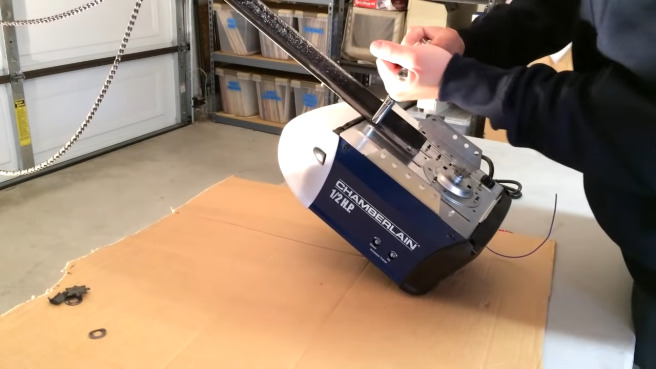
When you are done loosening your previous garage door opener, you can screw your new garage door opener to the tracks. Once you have screwed it to the tracks, place it back on the former support and screw the necessary bolts. Remember to reconnect the chain to provide more support and protection for your garage door opener.
Once you have successfully screwed the bolts, you can begin to do all the necessary settings and wired connections.
6. Do the Necessary Settings and Rewiring
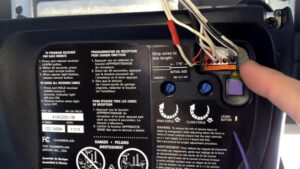
Although this might be the last thing to do, it is still the most important, as a mistake in this step can result in your garage door not opening or working. You need to take your time to adjust the settings for your new garage door opener carefully.
When adjusting the settings, using the previous settings that worked for you is one of the best options. Since your wires are already labeled, you can go ahead and connect the wires to the ports according to the various labels. You can also adjust the pressure settings of the garage door opener.
Once you have done all these, connect your garage door opener to the power and press the open Button to see if it works. Your garage door should open the moment you press the Button. However, you might have missed a step in the wiring or installation process if it doesn’t.
How Do I Replace a Garage Door Opener Remote?
More often than not, people often complain about their garage door remote being lost or broken. When this append, replacing it is a pretty good option. Here are the steps to replace your garage door opener remote below.
1. Check and Write Down the Remote Information
This is the first thing you must do if you want to replace your lost or broken remote. You need to check for the remote information as it allows you to know the brand or manufacturer, the serial number, and a lot more. Once you do this, it becomes easy to find a replacement.
The small real number and information are often in the remote’s battery compartment. Remove the battery and check the remote information. Write down information like the manufacturer and the model number on paper.
2. Contact the Manufacturer to Get a New Remote
Once you have all the necessary information on the remote, you should contact the manufacturer to get a new remote for your door opener. You might have to pay a certain fee to get the remote.
Check if the remote model is still in stock. If it is, confirm if you can get one at a specific time. Also, confirm the price. You can get all the necessary confirmation from their customer care or website.
Alternatively
You can get a universal remote if your remote model is no longer in stock. Sometimes, manufacturers stop the production of certain products. A universal remote is a good alternative if your remote is among them.
To get a universal remote, visit a garage door remote store and check out their various universal remotes in stock. Choose the one you feel is best suited or compatible with your garage door opener. If you are unsure of compatibility, you can easily check the product reviews online. You can also ask in various forums and communities online.
How Do I Program my Garage Door Opener to a New Remote?
Programming your garage door opener to a new remote is relatively easy. You dont need much to program the door to your new remote. Below is a guide or direction on programming your new remote.
1. Confirm the Remote is Compatible with your Garage Door Opener
When it comes to programming your garage door with a new remote, the first thing you must do is confirm the compatibility of the remote with your garage door. If you use a certain brand of garage door opener, using another brand of remote will likely not work.
However, if you are using a universal remote, ensure you are using a universal remote that is the same brand as your garage door opener.
2. Climb the Ladder, Find, and Press the Learn Button on your Garage Door Opener
Once you are done confirming the compatibility, the next thing you must do is climb a ladder to access the garage door opener. Once you can access the remote, look for the learn Button on your garage door opener.
Every garage door opener has a learn button to configure or reprogram to the remote settings. Once you see the learn Button on the garage door opener, press it until it blinks.
3. Press the Open Button within 30 seconds of Pressing the Learn Button
Once you press the learn Button, wait 30 seconds before pressing the open Button on your remote. Wait a minute for the calibration, and press the pen button again. Once you press this Button, your garage door should come open immediately.
How to Change the Garage Door Opener Battery
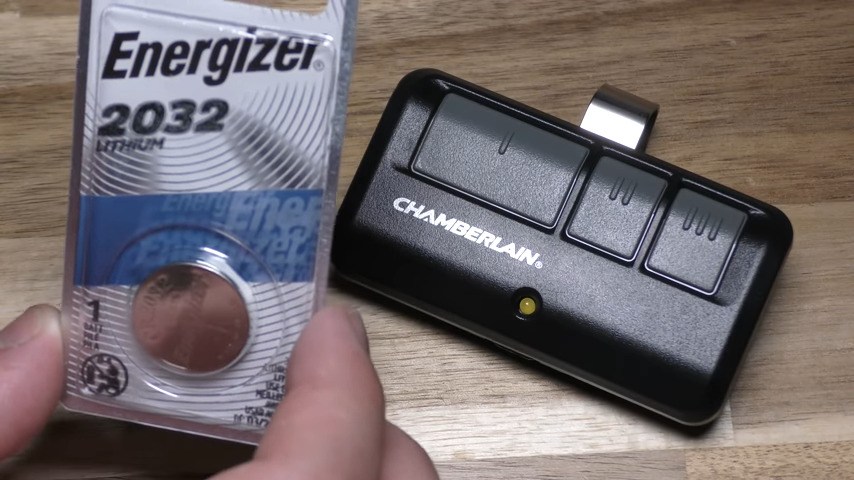
While a garage door opener battery should last between 10 to 15 years, circumstances might happen which will necessitate you to change your battery. Changing the battery to your garage door opener is relatively easy. All you need to do is follow the steps below.
- Unplug your garage door opener from the socket and open the light lens. You should see the battery located underneath the lens.
- Remove the protective cover and unscrew the battery compartment.
- Pull out the batteries and disconnect both the black and red wires
- Connect the red and black wires to the new battery and place them in the compartment.
- Plug in your garage door opener and use it with your remote.
How Do I Know If My Garage Door Opener Needs to be Replaced?
A garage door opener is often taken for granted until it stops working. It is an essential part of your garage door system, and it is crucial to know when it needs to be replaced.
1. Age of the Garage Door Opener
The first and foremost thing to consider when replacing your garage door opener is its age. The typical lifespan of a garage door opener is around 10 to 15 years.
If your garage door opener is nearing the end of its lifespan, it is better to replace it rather than repair it. An old garage door opener can fail anytime, leaving your car and belongings vulnerable.
2. Frequent Breakdowns
If you notice that your garage door opener is breaking down frequently, it is time to consider replacing it. Frequent breakdowns can indicate that your opener is no longer functioning correctly, and repairing it can be costly.
Replacing it with a new one will give you peace of mind, and you won’t have to worry about it breaking down again soon.
3. Slow Response Time
A garage door opener that takes a long time to respond to your commands or does not respond is a sign of a faulty opener.
Slow response time can be frustrating, especially in a hurry. In this case, replacing the garage door opener with a new one is better.
4. Unusual Noises
If your garage door opener makes unusual noises while operating, it is a sign that something is wrong. Grinding, scraping, or squeaking sounds can indicate that the opener’s motor or gears are wearing out.
These sounds can also be a sign of loose hardware or worn-out rollers. A professional inspection can help determine the root cause of the problem.
5. Security Concerns
A garage door opener is essential to your home’s security system. It is time to replace the opener if you notice any security concerns, such as the door not closing properly. An old garage door opener can malfunction, leaving your garage and home vulnerable to intruders.
6. Lack of Safety Features
New garage door openers come with safety features such as photo-eye sensors that prevent the door from closing if there is an obstruction. If your garage door opener does not have these safety features, it is time to upgrade to a new one.
Conclusion
While replacing your garage door opener can be a relatively complicated task, you can do it easily if you follow the steps listed in the article above.
Simply read the article above to get the information you need regarding replacing your garage door opener and a lot more. And you can read our previous content on unlocking garage doors from the inside.

